First of all create a new project, select Maven project and press next:


Select maven-archetype-webapp:

Configure the project:

Press finish to create the project. If you see error The superclass javax.servlet.http.HttpServlet was not found add Apache Tomcat to the runtime environments.

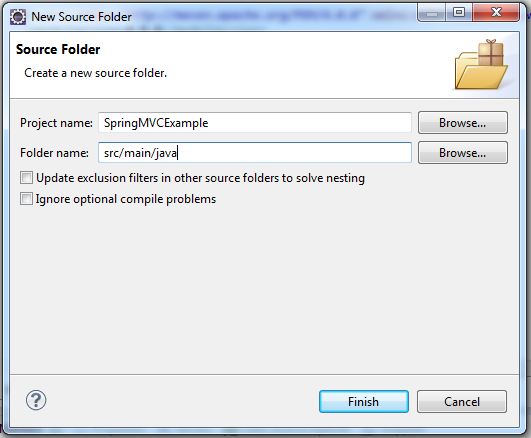
Create the source folder java:
You should add the dependencies in the pom.xml file, in order to load Spring framework and Jackson libraries:
<project xmlns:xsi="http://www.w3.org/2001/XMLSchema-instance" xmlns="http://maven.apache.org/POM/4.0.0" xsi:schemalocation="http://maven.apache.org/POM/4.0.0 http://maven.apache.org/maven-v4_0_0.xsd">
   <modelversion>4.0.0</modelversion>
   <groupid>com.devsourcenter</groupid>
   <artifactid>SpringMVCExample</artifactid>
   <packaging>war</packaging>
   <version>0.0.1-SNAPSHOT</version>
   <name>SpringMVCExample Maven Webapp</name>
   <url>http://maven.apache.org</url>
   <dependencies>
      <dependency>
         <groupid>org.springframework</groupid>
         <artifactid>spring-webmvc</artifactid>
         <version>4.1.4.RELEASE</version>
      </dependency>

      <dependency>
         <groupid>com.fasterxml.jackson.core</groupid>
         <artifactid>jackson-core</artifactid>
         <version>2.6.1</version>
      </dependency>

      <dependency>
         <groupid>com.fasterxml.jackson.core</groupid>
         <artifactid>jackson-databind</artifactid>
         <version>2.6.1</version>
      </dependency>
   </dependencies>
   <build>
      <finalname>SpringMVCExample</finalname>
   </build>
</project>
Create the mvc-dispatcher.xml file in the application classpath, in order to load the xml containing the beans definition. The tag
<mvc:annotation-driven /> allows us to use the Java annotations in our controller.<beans xmlns="http://www.springframework.org/schema/beans"
xmlns:context="http://www.springframework.org/schema/context"
xmlns:mvc="http://www.springframework.org/schema/mvc" xmlns:xsi="http://www.w3.org/2001/XMLSchema-instance"
xmlns:util="http://www.springframework.org/schema/util"
xsi:schemaLocation="http://www.springframework.org/schema/beans
http://www.springframework.org/schema/beans/spring-beans-4.0.xsd
http://www.springframework.org/schema/mvc
http://www.springframework.org/schema/mvc/spring-mvc-4.0.xsd
http://www.springframework.org/schema/util
http://www.springframework.org/schema/util/spring-util-4.0.xsd
http://www.springframework.org/schema/context
http://www.springframework.org/schema/context/spring-context-4.0.xsd">
<mvc:annotation-driven />
<import resource="classpath:beans-context.xml" />
</beans>
Create the beans-context.xml file in the application classpath, to register our Controller.
<beans xmlns="http://www.springframework.org/schema/beans"
   xmlns:context="http://www.springframework.org/schema/context"
   xmlns:cache="http://www.springframework.org/schema/cache" xmlns:util="http://www.springframework.org/schema/util"
   xmlns:infinispan="http://www.infinispan.org/schemas/spring" xmlns:p="http://www.springframework.org/schema/p"
   xmlns:xsi="http://www.w3.org/2001/XMLSchema-instance"
   xsi:schemaLocation="http://www.springframework.org/schema/beans
      http://www.springframework.org/schema/beans/spring-beans-4.0.xsd
      http://www.springframework.org/schema/mvc
      http://www.springframework.org/schema/mvc/spring-mvc-4.0.xsd
      http://www.springframework.org/schema/util
      http://www.springframework.org/schema/util/spring-util-4.0.xsd
      http://www.springframework.org/schema/context
      http://www.springframework.org/schema/context/spring-context-4.0.xsd">

   <bean id="rectangleController" class="com.devsourcenter.controller.RectangleController" />

</beans>
Configure the DispatcherServlet and integrate Spring in web.xml
<web-app xmlns="http://java.sun.com/xml/ns/javaee" xmlns:xsi="http://www.w3.org/2001/XMLSchema-instance"
       xsi:schemaLocation="http://java.sun.com/xml/ns/javaee
       http://java.sun.com/xml/ns/javaee/web-app_2_5.xsd"
       version="2.5">

   <display-name>SpringMVCExample</display-name>

   <servlet>
      <servlet-name>mvc-dispatcher</servlet-name>
      <servlet-class>org.springframework.web.servlet.DispatcherServlet</servlet-class>
         <init-param>
            <param-name>contextConfigLocation</param-name>
            <param-value>classpath:/mvc-dispatcher.xml</param-value>
         </init-param>
      <load-on-startup>1</load-on-startup>
   </servlet>

   <servlet-mapping>
      <servlet-name>mvc-dispatcher</servlet-name>
      <url-pattern>/</url-pattern>
   </servlet-mapping>
</web-app>
Now Spring is configured, so we can start coding. The Rectangle class will wrap the input data, while the Result class will contain output information:
package com.devsourcenter.model;

public class Rectangle {
   private Double length;
   private Double width;

   public Double getLength() {
      return length;
   }
   public void setLength(Double length) {
      this.length = length;
   }
   public Double getWidth() {
      return width;
   }
   public void setWidth(Double width) {
      this.width = width;
   }
}
package com.devsourcenter.model;

public class Result {
   private Double area;
   private Double perimeter;

   public Double getArea() {
      return area;
   }
   public void setArea(Double area) {
      this.area = area;
   }
   public Double getPerimeter() {
      return perimeter;
   }
   public void setPerimeter(Double perimeter) {
      this.perimeter = perimeter;
   }
}
The RectangleController will receive input data and will return the result with area and perimeter. When input data is invalid the controller returns error 400.
package com.devsourcenter.controller;

import org.springframework.http.HttpStatus;
import org.springframework.http.ResponseEntity;
import org.springframework.web.bind.annotation.RequestBody;
import org.springframework.web.bind.annotation.RequestMapping;
import org.springframework.web.bind.annotation.RequestMethod;
import org.springframework.web.bind.annotation.ResponseBody;
import org.springframework.web.bind.annotation.RestController;

import com.devsourcenter.model.Rectangle;
import com.devsourcenter.model.Result;

@RestController
public class RectangleController {

   @RequestMapping(value = "/calculate", method = RequestMethod.POST)
   public @ResponseBody ResponseEntity<?> calculate(
         @RequestBody Rectangle rectangle) {
      // check if input data is invalid
      if (rectangle.getLength() == null
            || rectangle.getLength() <= 0
            || rectangle.getWidth() == null
            || rectangle.getWidth() <= 0) {
         return new ResponseEntity<HttpStatus>(HttpStatus.BAD_REQUEST);
      } else {
         // if data is valid calculate area and perimeter
         Result res = new Result();
         res.setArea(rectangle.getLength() * rectangle.getWidth());
         res.setPerimeter(2 * (rectangle.getLength()
               + rectangle.getWidth()));

         // finally we return the result with status code 200
         return new ResponseEntity<Result>(res, HttpStatus.OK);
      }
   }
}
At this point our Application is complete, this is the final project directory structure:

We can launch the Application by right-clicking on the project SpringMVCExample and selecting Run As
-> Run on Server. After that can perform a test making a PUT call to http://localhost:8080/SpringMVCExample/calculate and passing a valid JSON: